
We all know what a DOM is. But what about a Shadow DOM? If this is the first time you are hearing about it, then you are in for a surprise. In this article, I will be discussing with you what a Shadow DOM is and how it can be used.
Before looking at what Shadow DOM is, let us have a recap of what DOM is.
DOM Overview
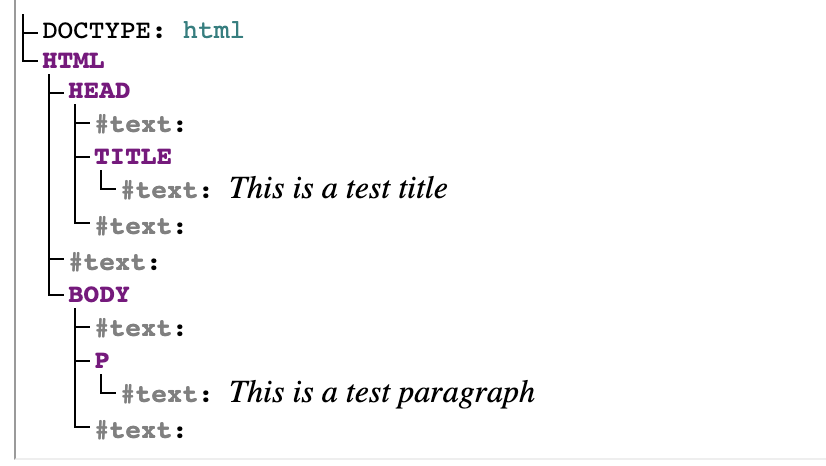
DOM or Document Object Model defines the structure of an HTML page and is generally represented as a tree of objects where each object represents an element. Let us take a basic HTML code as an example.
<!DOCTYPE html>
<html>
  <head>
    <title> This is a test title</title>
  </head>
  <body>
    <p> This is a test paragraph </p>
  </body>
</html>
The DOM representation for this may look like:
If we want to access these elements using Javascript, we generally go for the document.querySelector() function. This will get every element in the document, given a selector, no matter how deeply nested the elements are.
But there are times, when we want to isolate an element from the rest, so that whatever global CSS styles we apply, it does not affect that element. This is where Shadow DOM comes in.
What is a Shadow DOM?
It can be considered as a “DOM within a DOM“.
In a DOM element, we can append DOM nodes as children to that element. A Shadow DOM, on the other hand, is a type of DOM that can be created and attached to any element in the DOM, yet it is separated from its actual children. This scoped subtree is known as a shadow tree and the element that contains it is known as a shadow host.
We can also add <style> to the shadow tree which becomes local to the hosting element. A similar implementation of shadow DOM would be the <iframe> which plugins use to isolate its elements from the rest of the elements in a page.
Creating a Shadow DOM
Let us try creating a shadow DOM implementation of a simple button and for that, we need a shadow host.
<div class="shadow-host-div">
  <button> Submit </button>
</div>
This a normal button inside a div. Now, let us attach a shadow DOM to it. We need to use the attachShadow() method.
const shadowHost = document.querySelector(".shadow-host-div");
const shadowElement = shadowHost.attachShadow({mode: 'open'});
The function also supports a closed mode, which restricts access to elements inside the shadow DOM from an outside world. The above code will create an empty shadow root as a child of our host.
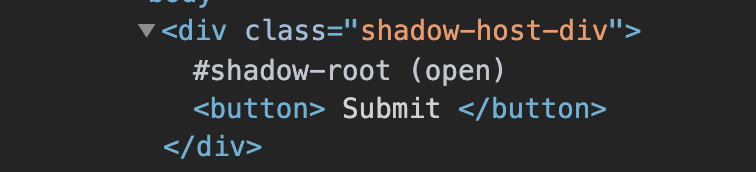
This is only visible in the inspector tool and not on the page. Now let’s add a similar button and attach it to the shadow DOM.
const button = document.createElement("button");
button.innerHTML = `${shadowHost.querySelector("button").textContent}`;
shadowElement.appendChild(button);
This will create a new button, with the text from the original DOM button element, and appends it to the shadow tree. This is what a normal button looks like in a Macbook.

Now, let us add some CSS to the button. We are adding dynamically adding CSS here since scoped CSS gives a better performance here. You can also use external stylesheets if you want.
const styles = document.createElement("style");
styles.textContent = `
    button {
        padding: 10px;
        background-color: orange;
        color: white;
        outline: 0;
        border: 0;
    }
`;
shadowElement.appendChild(styles);
This is called Scoped CSS as it is available only to the shadow element and will not affect any other elements outside the shadow tree.

The final shadow tree looks like:
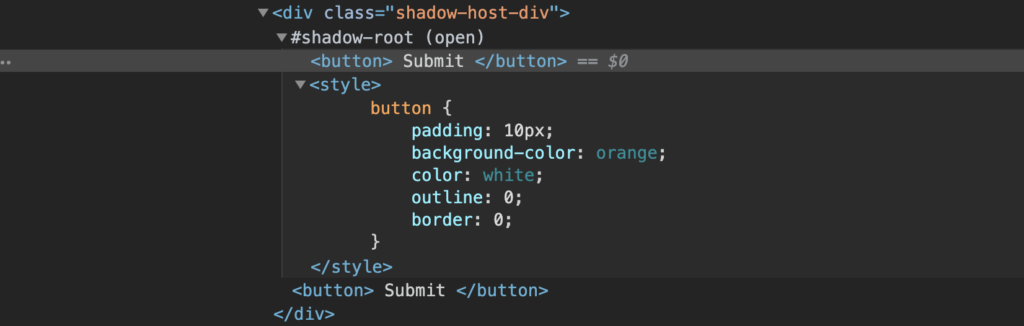
Since the <style> tag is present inside the shadow host, all styles defined inside will be accessible only to its elements.
Event model
When an event bubbles up from the shadow DOM, then those events are re-targeted to look like they came from the hosting element itself and not the shadow element.
For instance, let’s take the above button example and add a click event listener event which return document.activeElement. Even if we click the button, the containing <div> will be returned as the active element. And also, some events do not bubble up.
The events that do cross the shadow boundary are:
- Focus Events:
blur,focus,focusin,focusout - Mouse Events:
click,dblclick,mousedown,mouseenter,mousemove - Wheel Events:
wheel - Input Events:
beforeinput,input - Keyboard Events:
keydown,keyup - Composition Events:
compositionstart,compositionupdate,compositionend - DragEvent:
dragstart,drag,dragend,drop, etc.
Conclusion
I hope you liked the article. Please clap for the post if you liked it.
Also, if you are interested in creating a Clap button like the one hovering on the left, check out this article.
Please feel free to comment if you think this article can be improved.
Signing off for now.
Arigato Gozaimasu 🙂
References